Creating a New Calendar
-
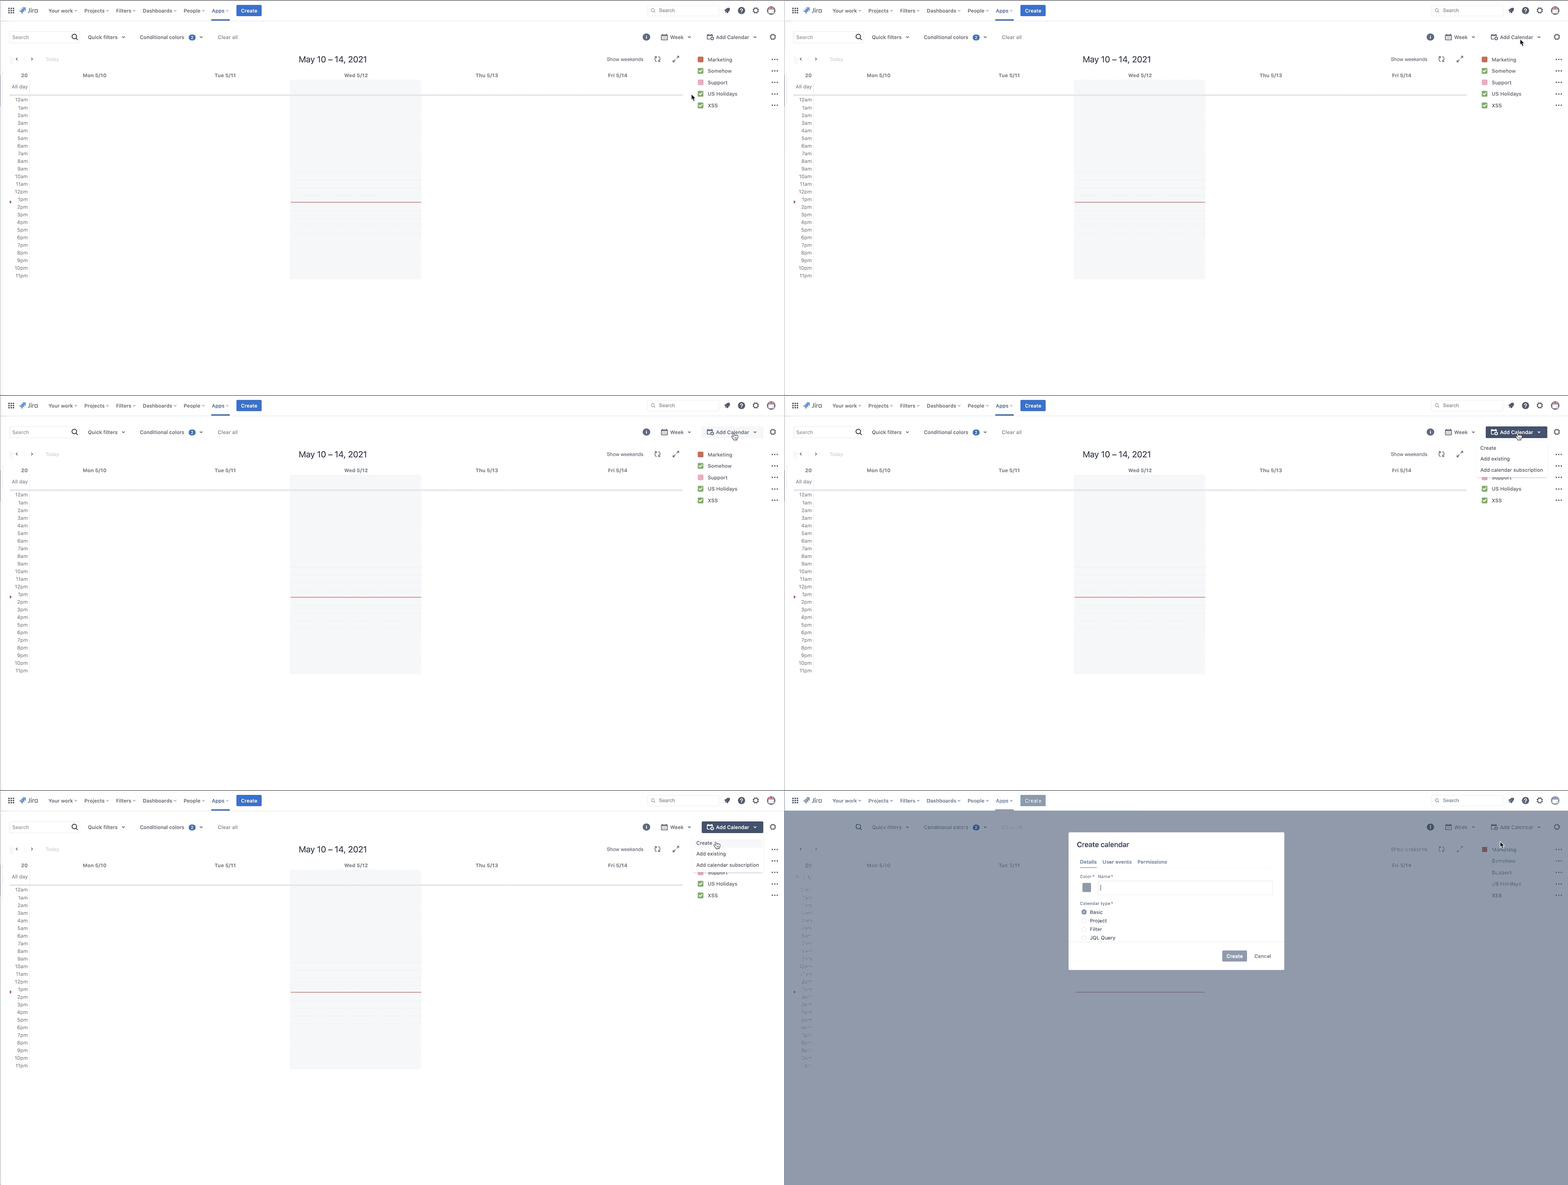
Click on "Add Calendar" located at the top right corner of your screen, then select "Create".
-
Fill in the necessary details for your new Calendar:
-
Name - Give your calendar a distinctive name. This name will appear in the calendar list when searched for.
-
Color - Select a color for your calendar. All events or issues will be displayed in this color on the calendar.
-
Calendar type - Choose from the following options:
-
Basic - This mode allows you to display and create events only.
-
Project - In this mode, you can choose a specific project to display tasks.
-
Filter - You can create a calendar using the filter function. Learn more about filters here.
-
JQL query - This option allows you to create a calendar using a JQL query. Learn more about filters here.
-
-
Project - Choose a project from the list of JIRA projects you have access to.
-
Event Start - You can use both JIRA system fields and custom fields (date and DateTime). The ability to edit the field is directly related to dragging and dropping issues on the calendar.
-
Event End - This field is optional. It indicates the task completion time on the calendar. If left blank, tasks will be displayed as one-day duration.
-
Event Fields - Select the JIRA fields to be displayed on the calendar.
-
Event info fields - Choose the JIRA fields to be shown on the calendar.
-
-
Click on "Create".

Adding Existing Calendars
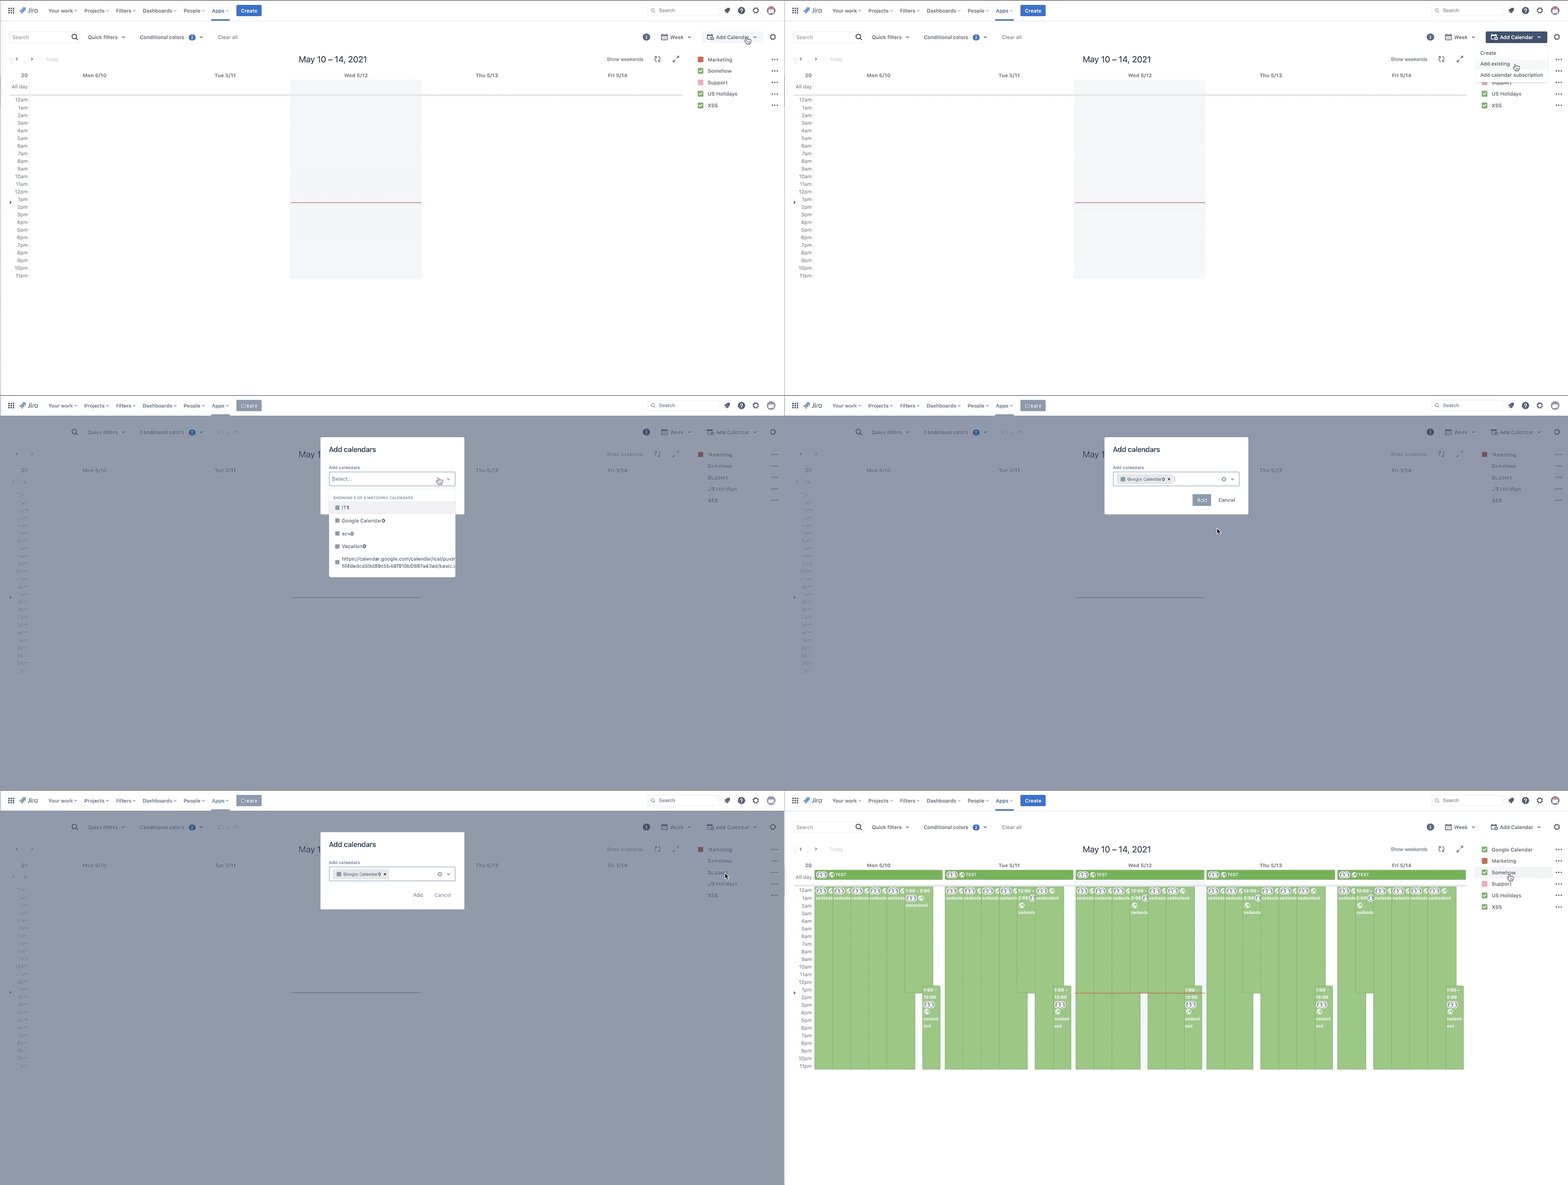
You can add other calendars from your Jira instance or even Google calendars to further streamline your scheduling.
-
Click the down arrow next to "Add Calendar", then select either:
-
Add Existing – to subscribe to another calendar in your Jira instance.
-
Add calendar subscription – to subscribe to a Google Calendar or any other calendar using its URL.

-
Editing Calendars
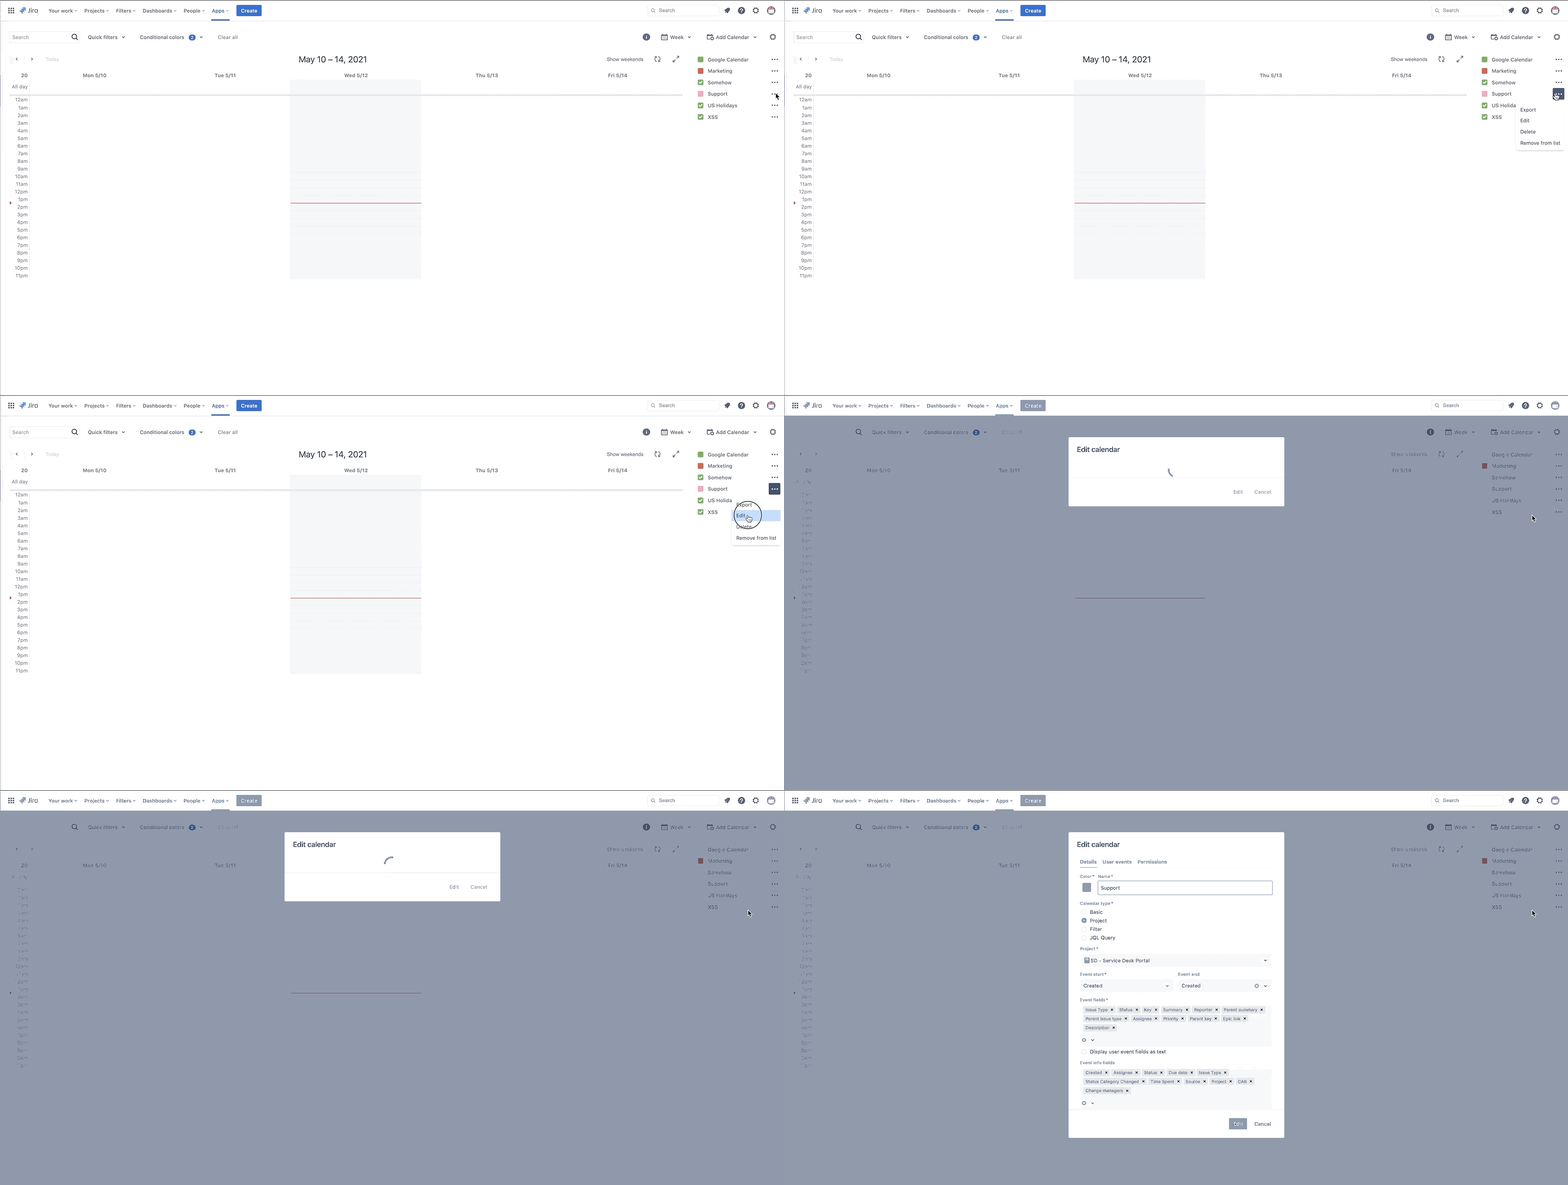
You can modify calendar details, such as changing its name, hiding specific event fields, or updating permissions, given you have the necessary permissions. Customizing event types and hiding default event fields can make your calendar suit your needs more closely.
-
Click the button next to the calendar name, then select "Edit".
-
Make changes to the calendar's name or any other information as needed.
